Unlock Your Pi's Potential: RemoteIoT Behind Router Example In Raspberry Pi
Have you ever felt a little stuck trying to get to your Raspberry Pi when it is sitting cozy behind your home router? It is a common puzzle, truly, for anyone wanting to control their small computer from afar. You see, that router, while keeping your home network safe and sound, also acts like a friendly guard, making it tricky for outside connections to reach devices inside, like your handy Raspberry Pi. This little obstacle often makes people wonder how they can truly get the most out of their smart projects, especially when they are not right there in front of the device.
Many folks, like you, want to tap into their Raspberry Pi's capabilities from anywhere, whether it is to check on a sensor, flip a light switch, or just run some code. But, as a matter of fact, the way home networks are set up often creates a barrier. It is almost like your Pi is in a special, private room, and your router is the only door, usually locked from the outside. So, finding a simple, secure way to open that door, just for your Pi, has been a goal for many hobbyists and developers alike.
This is where the idea of remote IoT, or "remoteiot" as some call it, really shines. It offers a smart path around these network barriers, letting your Raspberry Pi talk to you and the wider internet, even when it is tucked away behind your router. This article will walk you through setting up a remote IoT system with your Raspberry Pi, showing you how to manage and monitor your devices from anywhere in the world. You will discover that, with the right setup, you can access your Raspberry Pi from anywhere, even when it is tucked behind a router, which is pretty neat.
Table of Contents
- Why Remote Access is a Big Deal for Your Raspberry Pi
- The Router Challenge, Explained
- Traditional Paths to Remote Access (and their quirks)
- RemoteIoT: Stepping Up the Game
- Getting Started: Setting Up RemoteIoT on Your Raspberry Pi
- Keeping Your Remote Pi Safe and Sound
- What You Can Do with a Remote Pi: Real-Life Examples
- Troubleshooting: When Things Get Tricky
- Frequently Asked Questions (FAQs)
- Wrapping Things Up
Why Remote Access is a Big Deal for Your Raspberry Pi
Having remote access to your Raspberry Pi is a pretty big deal for many reasons, you know. For hobbyists, it means you can check on your smart home sensors while you are away, or perhaps adjust the settings of your automated plant watering system from work. For those using their Pi for data logging, it means you can collect information from a remote location without having to physically visit the site, which is very helpful.
It also opens up possibilities for remote monitoring, say, of a specific environment or even a security camera feed. You can, in a way, have eyes and hands on your projects no matter where you are. This capability, honestly, transforms the way we interact with connected devices, making our projects far more flexible and powerful. It allows you to really take control of your smart setups, even when they are not right next to you.
The potential for transforming how we interact with connected devices is immense, you see. By understanding the best practices and tools, you can truly make your Raspberry Pi a central part of your remote control ambitions. This kind of setup allows you to control and monitor your devices from just about anywhere, which is quite liberating.
- Fiona Gallagher Shameless
- Dafina Miftari
- What Does The Term Eiffel Tower Mean
- Mysterious Skin Bathroom
- Does Lol Superman Exist
The Router Challenge, Explained
So, why is it such a puzzle to reach your Raspberry Pi when it is sitting behind your router? Well, your home router uses something called Network Address Translation, or NAT, for short. Think of NAT as a post office that knows all the different apartments in your building (your devices) but only has one public address for the entire building. When a message comes from the outside, the post office does not automatically know which apartment it is for, so it just drops it, in a way, at the building's front door.
Your router also has a firewall, which is like a very strict doorman. It lets outgoing traffic leave your network but blocks most incoming traffic unless you have specifically told it to expect it. This is a good thing for security, as it stops unwanted visitors from getting into your private network. However, it also means that when you try to connect to your Raspberry Pi from outside your home, the router's firewall usually blocks that attempt, thinking it is an uninvited guest.
This is precisely why accessing your Raspberry Pi remotely, tethered by the constraints of your router, can be a real struggle for many. It is a fundamental part of network security, but it does mean we need a clever way to bypass it when we want legitimate remote access. This article will help you figure out some of those clever ways, really.
Traditional Paths to Remote Access (and their quirks)
Before we get into the cool world of RemoteIoT, it is helpful to know some of the more traditional ways people have tried to access their Raspberry Pi from afar. These methods have their place, but they also come with their own set of considerations, you know.
Port Forwarding: A Direct Approach
One common way to get to a device behind a router is through port forwarding. This is like telling your router's doorman, "Hey, if anyone knocks on this specific door number (a port), send them straight to this particular apartment (your Raspberry Pi's IP address)." It is a direct line, more or less, from the internet to your Pi.
The main issue with port forwarding is security. When you open a port, you are essentially creating a direct path from the entire internet to your Raspberry Pi. If your Pi is not properly secured, with strong passwords and up-to-date software, it could be vulnerable to unwanted access. Also, many home internet connections have dynamic IP addresses, meaning your public IP address changes from time to time. This makes it hard to consistently connect unless you use a dynamic DNS service, which is another layer of setup.
While it can work, ensuring your Raspberry Pi is securely connected behind a router is critical to avoiding vulnerabilities and maintaining optimal performance. So, you have to be very careful with this method, really.
Virtual Private Networks (VPNs) for Security
Setting up a VPN server on your home network, perhaps even on another Raspberry Pi, is a much more secure way to get remote access. When you connect to your home VPN, your remote device acts as if it is physically on your home network. This means you can access all your local devices, including your Pi, without needing to open specific ports for each one.
The downside is that setting up a VPN server can be a bit more involved. It requires some technical know-how to configure both the server and your client devices. Plus, you still might need to forward one port on your router for the VPN server itself. But, honestly, for those who value security above all else, this is often the preferred method.
It is a good option, certainly, for keeping things private and secure, but it does add a layer of complexity to the setup process, you know.
SSH and VNC: Direct Connections
Once you have a way to connect to your Raspberry Pi's network, you can use tools like SSH (Secure Shell) for command-line access or VNC (Virtual Network Computing) for a graphical desktop interface. These are the tools you would use to actually interact with your Pi once the network path is clear.
However, SSH and VNC themselves do not solve the "behind the router" problem. They rely on the underlying network connection being established first, whether through port forwarding, a VPN, or a cloud-based remote IoT service. They are, in a way, the language your remote device speaks to your Pi, not the bridge itself.
These tools are very useful, obviously, but they are just part of the overall solution for remote access. You need that initial connection to be made first, after all.
RemoteIoT: Stepping Up the Game
This is where RemoteIoT really comes into its own. RemoteIoT services provide a simpler, often more secure, and usually more reliable way to connect to your Raspberry Pi when it is behind a router. Instead of opening ports or setting up complex VPNs, these services act as a middleman, creating a secure tunnel between your Pi and their cloud platform.
Your Raspberry Pi connects *out* to the RemoteIoT cloud, which is usually allowed by your router's firewall. Then, when you want to access your Pi, you connect *to* the same RemoteIoT cloud. The cloud service then routes your request securely to your Pi through the established tunnel. It is a bit like your Pi calling a central switchboard, and then you call the same switchboard to be connected to your Pi, regardless of where either of you are.
Remoteiot is a powerful solution for connecting devices behind a router, enabling seamless communication even when they are not on the same network. This means you can manage and monitor devices from anywhere in the world, which is a fantastic opportunity for managing and monitoring devices from anywhere in the world, truly. By leveraging Raspberry Pi as a platform, users can create robust remote IoT setups that function seamlessly behind routers, ensuring privacy and security. This is, in fact, why remoteiot behind router raspberry pi has become a buzzword for many.
Getting Started: Setting Up RemoteIoT on Your Raspberry Pi
Let us get down to the practical steps of setting up RemoteIoT with your Raspberry Pi. This guide will walk you through the process, even when it is behind a router, so you can have a clear idea of what to do by the end of this article.
What You Will Need
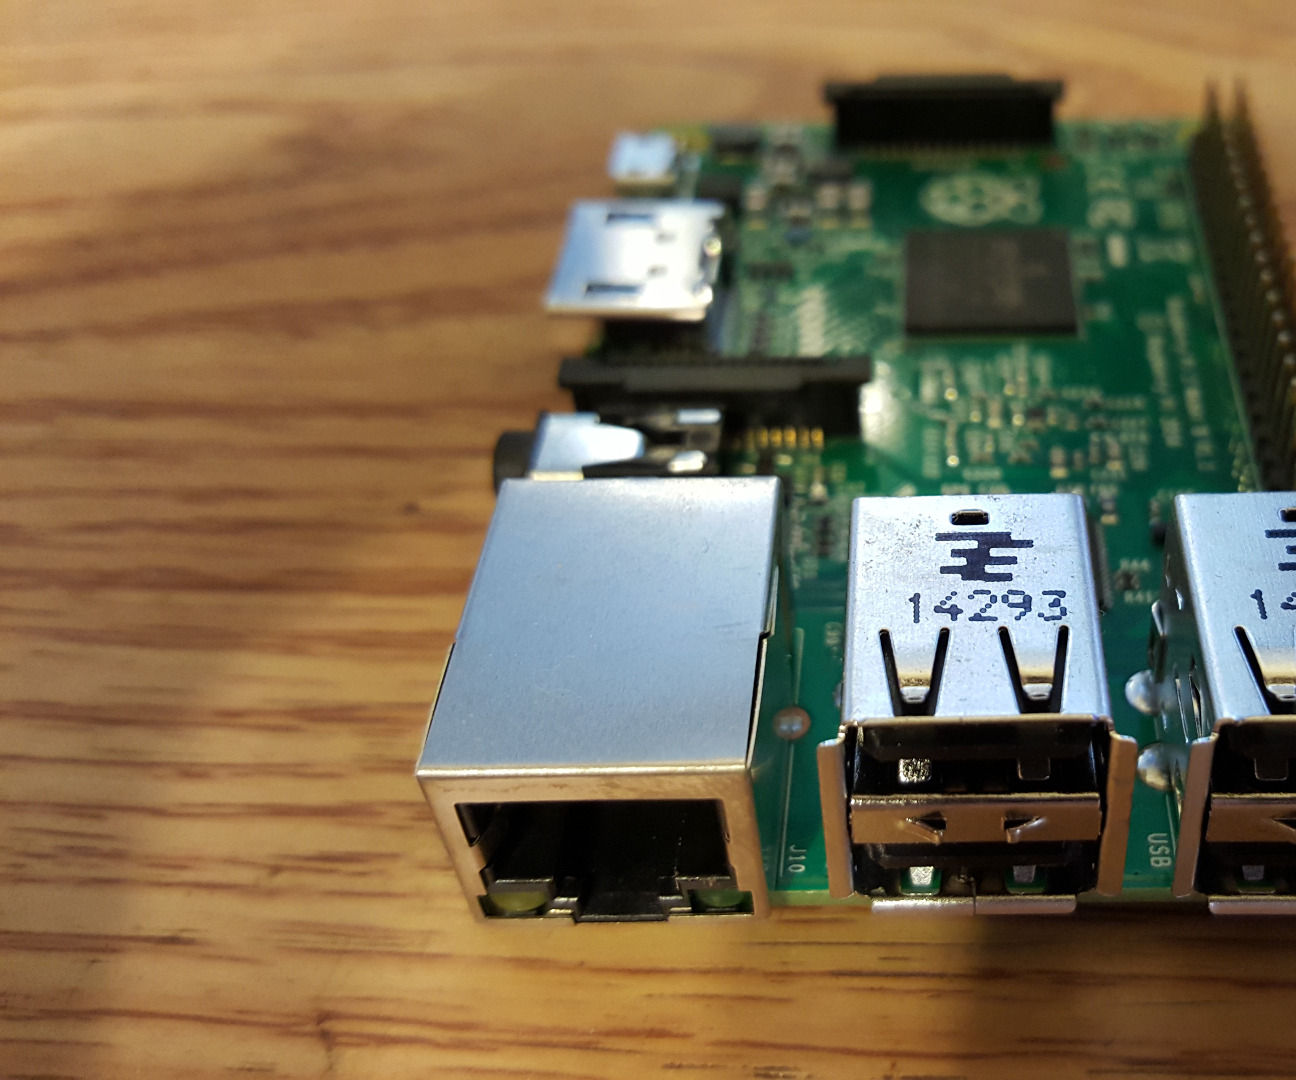
Before you begin, make sure you have a few things ready. You will need a Raspberry Pi, of course, with a working operating system like Raspberry Pi OS. A stable internet connection for your Pi is also quite important. You will also need a computer to set up your Pi initially, and an account with a chosen RemoteIoT service. A common configuration, typically, involves using Raspberry Pi OS, which is a good starting point for many.
Picking a RemoteIoT Service
There are several RemoteIoT services available, some of which offer free tiers that are perfect for personal projects. You will want to look for one that supports Raspberry Pi and offers the kind of remote access you need, whether it is SSH, VNC, or a web interface. Some services focus on specific IoT protocols, while others provide a more general remote access tunnel. You can use the RemoteIoT secure IoT cloud for many of these setups, for example.
Some of these services might offer free options, which is a big plus for hobbyists. From choosing the right software to configuring your system, you can often find setups that are completely free to use. So, do a little research to find one that fits your needs and budget, if that is a concern.
Step-by-Step Installation and Configuration
The exact steps will vary slightly depending on the RemoteIoT service you choose, but the general flow is pretty similar. First, you will typically need to install a client application or agent on your Raspberry Pi. This usually involves opening a terminal on your Pi and running a few commands to download and install the necessary software.
Next, you will configure the agent to connect to your RemoteIoT service account. This often means copying an API key or a unique device ID from your service's web dashboard and pasting it into a configuration file on your Pi. Once configured, you will start the agent, and it should establish a connection to the RemoteIoT cloud. This is, in a way, the core of the setup.
This article will provide practical solutions, tips, and examples to help you configure remote IoT setups with Raspberry Pi. By the end of this guide, you will have a solid understanding of how to get this working, which is pretty exciting.
Connecting to the RemoteIoT Cloud
Once the agent on your Raspberry Pi is running and connected, you will usually see your Pi appear as an online device in your RemoteIoT service's web dashboard. This dashboard is where you will manage your remote connections. From there, you can typically initiate an SSH session, a VNC session, or access any web services running on your Pi, all through the secure tunnel provided by the RemoteIoT service.
This secure tunnel means you do not need to worry about port forwarding or your router's firewall. The connection is handled by the RemoteIoT service, making it much simpler and, in many cases, more secure than opening ports directly. It is, basically, a seamless way to get to your Pi.
Accessing Your Pi from Anywhere
With the RemoteIoT setup complete, you can now access your Raspberry Pi from anywhere in the world with an internet connection. Whether you are on your laptop at a coffee shop, using your phone on vacation, or another computer at a friend's house, you can connect to your Pi just as if it were sitting right next to you. This truly unlocks the full potential of your IoT projects, with a seamless and secure remote connection.
This kind of configuration offers incredible opportunities for managing and monitoring devices from anywhere. By following these steps, you can create a powerful solution for controlling and monitoring smart devices, which is quite useful. It is a very flexible way to work with your Pi, actually.
Keeping Your Remote Pi Safe and Sound
While RemoteIoT services add a layer of security, it is still very important to follow general security best practices for your Raspberry Pi. Always change the default password, for one thing. Use strong, unique passwords for any services running on your Pi and for your RemoteIoT account. Regularly update your Raspberry Pi's operating system and any installed software to patch security vulnerabilities.
Limit the services you expose remotely to only what is absolutely necessary. If you only need SSH access, do not enable VNC or a web server unless you truly need them. The less you expose, the less there is for potential attackers to find. By following these steps, you can create a secure and efficient IoT system behind your router, which is very important.
Remember, a secure setup is critical to avoiding vulnerabilities and maintaining optimal performance. So, always keep security in mind, you know, when setting up remote access.
What You Can Do with a Remote Pi: Real-Life Examples
Once you have your Raspberry Pi accessible remotely, the possibilities really open up. You could, for instance, set up a home automation system that you control from your phone while you are away. Imagine turning on your lights before you get home or checking if your garage door is closed.
Another example could be a remote weather station. Your Pi collects temperature, humidity, and pressure data, and you can log in from anywhere to see the current conditions or historical trends. Or, perhaps, a remote security camera system that sends you alerts and lets you view live footage from your phone. These are just a few ideas, but the options are pretty vast, honestly.
For Raspberry Pi enthusiasts, setting up a remote IoT system behind a router can unlock countless possibilities. This setup allows you to control and monitor your devices from anywhere, which is a great advantage. You can truly transform the way you interact with connected devices, which is very cool.
Troubleshooting: When Things Get Tricky
Even with the best guides, sometimes things do not go exactly as planned. If you are having trouble connecting to your remote Pi, here are a few things to check. First, make sure your Raspberry Pi is powered on and connected to the internet. Sometimes a simple reboot of the Pi or your router can fix minor network glitches.
Next, check the status of the RemoteIoT agent running on your Pi. Is it active and showing as connected to the cloud service? Your RemoteIoT service's dashboard should give you clues about the connection status. Also, double-check your configuration files for any typos or incorrect keys. A tiny mistake can stop everything from working, you know.
If all else fails, consult the documentation for your specific RemoteIoT service. They often have detailed troubleshooting guides. Sometimes, it is just a small setting that needs tweaking, and a little patience usually helps. Remember, these kinds of setups can be a bit finicky at times, but they are usually worth the effort.
Frequently Asked Questions (FAQs)
How do I access my Raspberry Pi from outside my home network?
You can access your Raspberry Pi from outside your home network by using a RemoteIoT service, which creates a secure tunnel through your router without needing complex port forwarding. Other methods include setting up a VPN server on your home network or, if you are comfortable with the risks, configuring port forwarding on your router directly to your Pi. Each approach has its own benefits and security considerations, but RemoteIoT often simplifies the process considerably.
Is it safe to expose my Raspberry Pi to the internet?
Exposing your Raspberry Pi to the internet can be safe, but it requires careful attention to security. Always use strong, unique passwords, keep your Raspberry Pi OS and all software updated, and only expose necessary services. Using a secure RemoteIoT service or a VPN adds a significant layer of protection compared to direct port forwarding, as these methods reduce the direct attack surface. It is very important to prioritize security measures to avoid vulnerabilities and maintain optimal performance.
What are the best methods for remote access to a Raspberry Pi?
The best methods for remote access to a Raspberry Pi often depend on your specific needs for security and ease of setup. For many, RemoteIoT services are excellent as they simplify connectivity behind a router while offering good security. VPNs provide a very secure way to connect, making your remote device appear as if it is on your local network. Direct SSH or VNC connections are powerful for interacting with your Pi, but they require an underlying network connection established by one of the other methods, like RemoteIoT or a VPN. You can, for example, find setups that are completely free to use, which is quite handy.
Wrapping Things Up
Setting up your Raspberry Pi for remote access behind a router using RemoteIoT is a truly powerful way to expand what you can do with your projects. It moves your Pi from being a local device to a globally accessible one, opening up a whole new world of control and monitoring. By understanding how RemoteIoT works and following the steps to get it running, you are well on your way to mastering remote access.
Remember, the raspberry pi is one of the best tools out there for creating a secure and efficient IoT system behind your router. This guide has explored a variety of strategies and tools, examining the different approaches one can use to set up a remote IoT system behind a router for Raspberry Pi. It is a journey that, you know, makes your Pi much more useful.
So, go ahead and give it a try! You might find that the ability to control your Raspberry Pi from anywhere makes your IoT projects far more exciting and practical. Learn more about Raspberry Pi projects on our site, and link to this page for more remote access tips.
- Who Are Zoe Perrys Parents Unveiling The Family Background Of The Talented Actress
- Ripped Reiley
- Froot Vtuber Cheating
- Ittesu Suzuki
- Iranian Sexism
Build a router using raspberry pi - valasopa

Best Remote IoT Behind Router Raspberry Pi: A Comprehensive Guide

Best Remote IoT Behind Router Raspberry Pi: A Comprehensive Guide
