How To Access Raspberry Pi Remotely Over The Internet: Your Guide To Staying Connected
Ever wish you could reach your Raspberry Pi from anywhere in the world, even if you are miles away from your home network? Many folks do, and it is a pretty common desire for anyone who works with these small, powerful computers. Perhaps you have a project running at home, like a smart garden monitor or a media server, and you want to check on it or make changes without physically being there. That kind of freedom is what remote access is all about, you know?
Having the ability to access your Raspberry Pi remotely over the internet opens up a whole new set of possibilities. It means your little computer is no longer tied to your desk or local network. You could be on vacation, at a coffee shop, or even just in another room, and still have full control. It's a bit like having a tiny, dedicated assistant always ready to respond to your commands, which is actually quite neat.
Just like how a wireless access point helps your devices connect to a network, allowing them to communicate and share data, we are going to explore ways to get "access" to your Raspberry Pi from a distance. This guide will walk you through some popular and effective methods, helping you pick the best way for your own projects. So, let's get into how you can make your Raspberry Pi truly accessible, no matter where you happen to be.
- Denzel Washington Training Day
- Aishah Sofey Leak Free
- Many Summers Later Gravity Falls
- What Does The Term Eiffel Tower Mean
- Ripped Reiley
Table of Contents
- Understanding Remote Access for Your Raspberry Pi
- Essential Preparations Before You Start
- Method 1: SSH – The Command Line Friend
- Method 2: VNC – Visual Control from Anywhere
- Method 3: Cloud-Based Services for Simpler Access
- Keeping Your Remote Connection Safe
- Troubleshooting Common Remote Access Issues
- Frequently Asked Questions About Remote Pi Access
- The Future of Remote Pi Control
- Conclusion
Understanding Remote Access for Your Raspberry Pi
When we talk about remote access for your Raspberry Pi, it simply means being able to control or interact with your Pi from another computer or device, even if that device is not on the same local network. So, if your Pi is at home, you could be using a laptop at a coffee shop to send commands to it or see what it is doing. It's really about extending your reach, you know?
What Remote Access Means
Remote access essentially sets up a secure pathway between your outside device and your Raspberry Pi. This pathway lets data travel back and forth, making it seem like you are sitting right in front of your Pi, even when you are not. It could be for typing commands, viewing its desktop, or transferring files. There are, actually, quite a few ways to make this happen.
Why You'd Want Remote Access
There are many good reasons to set this up. Perhaps your Raspberry Pi is tucked away in a hard-to-reach spot, like inside a weather station or a smart home hub. Maybe you just do not want to connect a monitor, keyboard, and mouse every time you need to tweak something. Remote access gives you convenience and flexibility, allowing you to manage your projects from almost anywhere. It is a very practical skill to have, as a matter of fact.
- Duck Dynasty The Wealth Of Willie Robertson
- Player 125
- Richard Hoffman Police
- Roma Downey Feet
- From Champion To Inspiration Ronnie Coleman Now
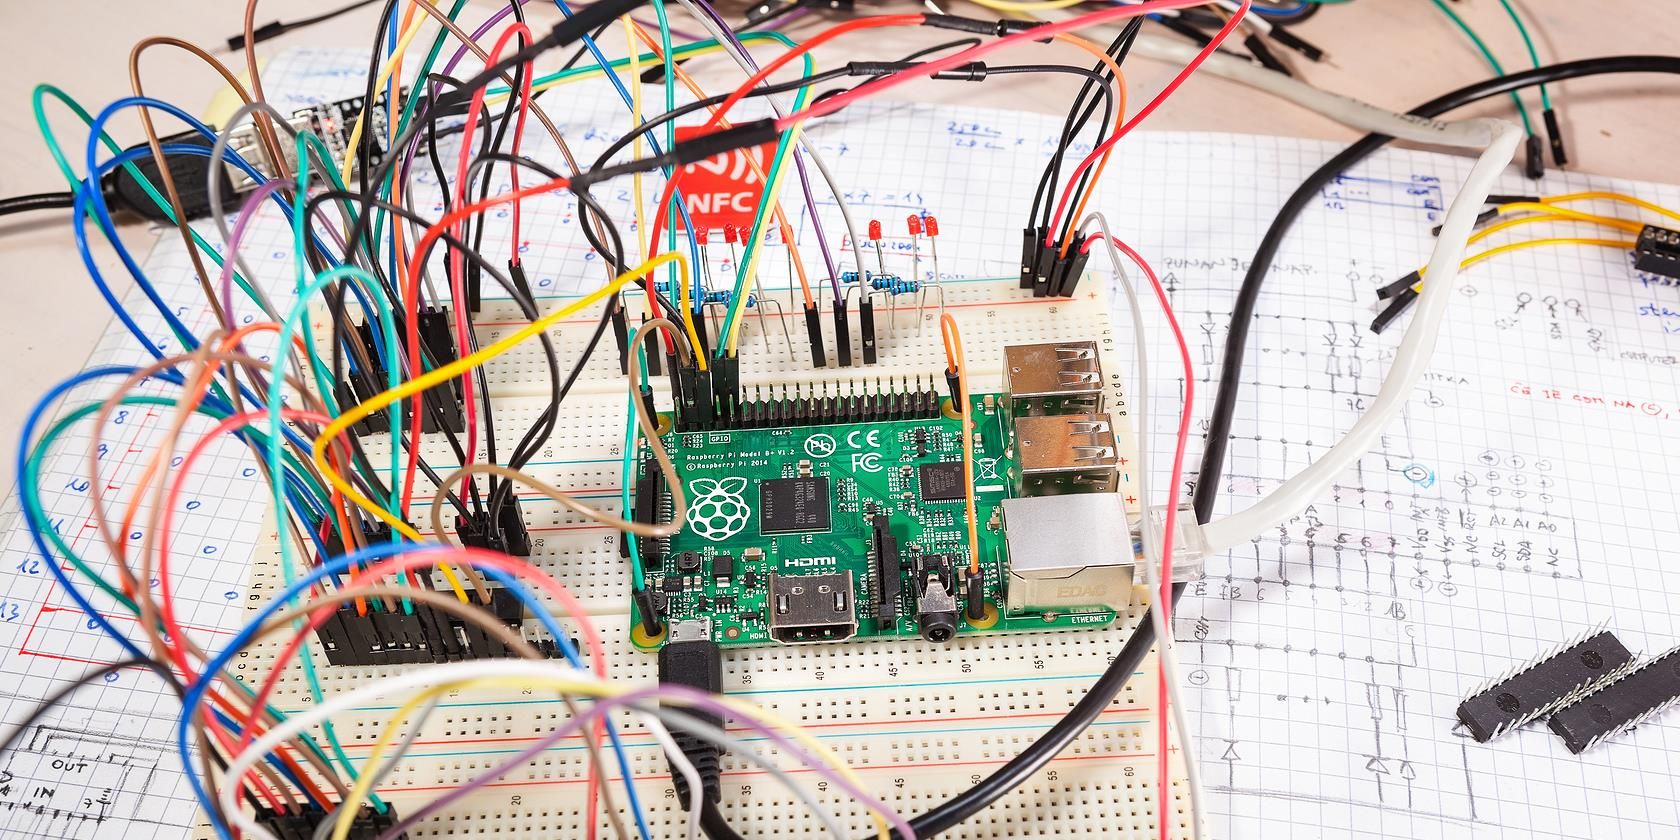
Essential Preparations Before You Start
Before you jump into setting up remote access, there are a few basic things you should get in order on your Raspberry Pi. These steps help make sure everything runs smoothly and securely. It is a bit like making sure all your tools are ready before you start a building project, you know?
Getting Your Pi Ready
First off, make sure your Raspberry Pi's software is completely up to date. This helps prevent issues and keeps your system secure. You can do this with a couple of simple commands in the terminal, which is pretty straightforward.
Open a terminal on your Raspberry Pi.
Type
sudo apt updateand press Enter. This command refreshes the list of available software.Then, type
sudo apt upgrade -yand press Enter. This command installs any new versions of your software. The-yjust says "yes" to any prompts, so you do not have to keep typing it.
Next, you will want to enable the specific services you plan to use for remote access, like SSH or VNC. These are usually turned off by default for security reasons. You can enable them through the Raspberry Pi configuration tool, which is really simple to use.
Type
sudo raspi-configin the terminal and press Enter.Go to 'Interface Options'.
Select 'SSH' and choose 'Yes' to enable it. Do the same for 'VNC' if you plan to use a graphical desktop connection. You will find that it is quite easy to find these options.
Exit the tool and reboot your Pi if it asks you to. This ensures the changes take effect.
Network Considerations
For reliable remote access, it is often helpful to give your Raspberry Pi a static IP address on your local network. This means its IP address will not change, making it easier to find later. Otherwise, your router might give it a different address each time it connects, which can be a bit annoying. You can usually set this up in your router's settings or directly on the Pi itself, though setting it on the Pi is often simpler for most people.
Also, give some thought to your home network's firewall. Your router has a built-in firewall that blocks incoming connections from the internet by default. For remote access to work, you will need to open specific "ports" on your router to allow traffic to reach your Pi. This is called "port forwarding." It sounds a bit technical, but it is actually a common step for many home network setups, so it is something you will get a handle on.
Method 1: SSH – The Command Line Friend
SSH, or Secure Shell, is probably the most common and secure way to access your Raspberry Pi remotely. It gives you a command-line interface, which means you type commands directly into a terminal window on your computer, and they run on your Pi. It is very efficient and uses very little bandwidth, which is a good thing.
What is SSH?
SSH creates an encrypted connection between your computer and your Raspberry Pi. This means that any data you send, like your password or commands, is scrambled so no one else can read it. It is a bit like having a secret, secure tunnel for your commands, which is pretty cool.
Setting Up SSH on Your Pi
We already covered how to enable SSH using sudo raspi-config in the preparation steps. Once it is enabled, your Pi is ready to accept SSH connections. You will just need its IP address on your local network to connect from another computer on the same network, which is generally easy to find.
Connecting from Outside Your Network
This is where it gets a little more involved. To connect to your Pi from the internet, you need to tell your home router to send incoming SSH requests to your Raspberry Pi's local IP address. This is what port forwarding does, as a matter of fact.
Port Forwarding Explained
Think of your router as a doorman for your home network. When someone on the internet tries to connect to your public IP address (your home's address on the internet), the doorman usually blocks them. Port forwarding tells the doorman, "If someone knocks on a specific 'door' (a port number, usually 22 for SSH), let them through and send them directly to this specific room (your Raspberry Pi's local IP address)." You will need to log into your router's settings, usually through a web browser, to set this up. The exact steps vary by router brand, but the idea is the same, which is good.
Using a Dynamic DNS Service
Your home's public IP address usually changes over time unless you pay your internet provider for a static one. This means your remote connection might break when your IP changes. A Dynamic DNS (DDNS) service helps with this. It gives you a fixed hostname (like `myraspi.ddns.net`) that always points to your current home IP address. Your Pi or router periodically updates the DDNS service with your new IP if it changes. This makes it much easier to connect without constantly checking your IP, which is a very handy thing.
Security Tips for SSH
When opening your Pi to the internet, security is a big deal. You really want to keep your Pi safe from unwanted visitors. Here are a few simple ways to do that, so pay attention to these.
Change your default password: The default Raspberry Pi password is "raspberry." Change it immediately to something long and complex. This is the first thing you should do, actually.
Use SSH Key Authentication: Instead of passwords, use SSH keys. This is much more secure. You generate a pair of keys: a public key that goes on your Pi and a private key that stays on your computer. Your computer uses the private key to prove it is you, which is a lot safer than typing a password.
Change the default SSH port: SSH usually uses port 22. Changing it to a different, less common port (like 2222 or 22022) can deter automated attacks that target the default port. It is a small step that can make a difference, you know.
Method 2: VNC – Visual Control from Anywhere
While SSH gives you a command line, VNC (Virtual Network Computing) lets you see and control your Raspberry Pi's graphical desktop environment from your remote device. This is great if you prefer a visual interface, which many people do. It is like having a monitor, keyboard, and mouse for your Pi, but all over the internet, so it is quite convenient.
What is VNC?
VNC is a system that allows you to remotely control another computer's desktop. It sends the screen output from your Pi to your remote computer and sends your mouse and keyboard inputs back to the Pi. It is a very visual way to interact, which is sometimes what you need.
Installing VNC Server on Your Pi
Just like with SSH, you will need to enable VNC through sudo raspi-config first. Once enabled, a VNC server will run on your Pi. You might also need to install a VNC server software if it is not already present, which is pretty straightforward using apt. For instance, RealVNC Connect is often pre-installed or easily added, and it is a good choice, you know.
Connecting with VNC Viewer
On your remote computer or device, you will need a VNC Viewer application. RealVNC offers a free viewer for many platforms, which is pretty handy. You just open the viewer, enter your Pi's IP address (or DDNS hostname), and then provide the VNC password you set up on your Pi. You will then see your Pi's desktop appear on your screen, which is quite satisfying.
VNC and Port Forwarding
Similar to SSH, if you want to access your Pi's VNC desktop from outside your home network, you will need to set up port forwarding on your router. VNC typically uses port 5900 (or 5901 for the first desktop, and so on). So, you will tell your router to forward incoming traffic on port 5900 (or your chosen VNC port) to your Raspberry Pi's local IP address and that same port. This is a very similar process to setting up port forwarding for SSH, so if you did one, the other will feel familiar.
Method 3: Cloud-Based Services for Simpler Access
For those who find port forwarding and dynamic DNS a bit too much to handle, cloud-based services offer a much simpler way to access your Raspberry Pi remotely. These services create a secure connection without needing you to mess with your router settings. They are often called "VPN alternatives" or "zero-config VPNs," and they are quite popular for a good reason.
Introducing Services Like Zerotier, Tailscale, or Ngrok
Services like Zerotier, Tailscale, and Ngrok act as intermediaries. They create a virtual network that your Raspberry Pi and your remote device both connect to. This virtual network makes it seem like your devices are on the same local network, even if they are physically miles apart. It is a bit like having a private club where only your devices are members, which is pretty clever.
How They Work
You install a small client application on your Raspberry Pi and on your remote device. Both clients connect to the service's cloud servers. The service then sets up a secure, encrypted tunnel between your devices. This tunnel bypasses the need for port forwarding because the connection is initiated from *inside* your network going *out* to the cloud service, which your router typically allows. This is a very different approach, and often much simpler, so it is worth considering.
Advantages and Disadvantages
The biggest advantage of these services is their ease of setup. No router configuration is needed, and they often handle dynamic IP addresses automatically. They also add an extra layer of security with their encrypted tunnels. However, a potential downside is that you are relying on a third-party service, and some features might be behind a paid subscription. For basic remote access, though, many offer a free tier that is perfectly fine. It is a trade-off, really, between convenience and full control.
Keeping Your Remote Connection Safe
No matter which method you choose for how to access raspberry pi remotely over the internet, keeping your connection secure is really important. When you open your Pi to the internet, you are also opening it up to potential risks. So, taking some precautions is a very smart move, you know.
Strong Passwords
This might seem obvious, but it is worth repeating. Always use strong, unique passwords for your Raspberry Pi and any remote access services. A strong password includes a mix of uppercase and lowercase letters, numbers, and symbols, and it should be quite long. Avoid using easily guessable things like birthdays or common words. A password manager can help you keep track of these, which is very useful.
SSH Key Authentication
As mentioned before, for SSH, using key-based authentication is far more secure than passwords. If someone guesses your password, they can get in. If you use keys, they would need your private key file, which should be kept safe on your local machine. It adds a really strong layer of protection, as a matter of fact.
Regular Updates
Keep your Raspberry Pi's operating system and all installed software updated. Software updates often include security patches that fix vulnerabilities. Running sudo apt update and sudo apt upgrade regularly helps keep your system protected against newly discovered threats. It is a simple habit that makes a big difference, you know.
Firewall Rules
Even if you are using port forwarding, consider setting up a firewall on your Raspberry Pi itself using a tool like UFW (Uncomplicated Firewall). This lets you control which incoming connections your Pi accepts, even after they pass through your router. You can set rules to only allow connections from specific IP addresses or to specific services. This is a very good way to add an extra layer of defense.
Troubleshooting Common Remote Access Issues
Sometimes things do not work perfectly the first time, and that is okay. Remote access can be a bit tricky with network settings. Here are some common problems you might run into and how to sort them out, which is pretty helpful.
Connection Refused
If you get a "connection refused" error, it usually means your remote device could not establish a link with your Pi. This often points to SSH or VNC not running on the Pi, or a firewall on the Pi blocking the connection. Double-check that SSH/VNC is enabled and that your Pi's firewall (if you set one up) is allowing the connection. It could also mean your port forwarding is sending the connection to the wrong local IP address, which is something to check.
Slow Performance
If your remote connection is really sluggish, especially with VNC, several things could be at play. Your internet upload speed at home is a big factor; VNC sends a lot of visual data. A slow Wi-Fi connection on either end can also cause problems. Try connecting via SSH first to see if the network itself is the issue, as SSH uses much less bandwidth. You might also try reducing the VNC quality settings for a smoother experience, which can help a lot.
Port Forwarding Problems
This is a common sticking point. If you cannot connect from outside your network but can connect locally, your port forwarding is probably the issue. Double-check the public port, the internal IP address of your Pi, and the internal port number in your router settings. Make sure your router's firewall is not blocking the forwarded port. Sometimes, a simple router reboot can even fix things, which is worth a try.
Frequently Asked Questions About Remote Pi Access
Here are some questions people often ask when they are trying to access their Raspberry Pi from afar, which is quite common.
Can I use my phone to access my Raspberry Pi remotely?
Absolutely! Many SSH client apps and VNC viewer apps are available for both Android and iOS devices. You can just download one from your app store, enter your Pi's details, and you will be able to connect. It is actually very convenient for quick checks or commands, you know.
Is it safe to leave my Raspberry Pi accessible from the internet?
It can be safe, but only if you take proper security measures. Using strong, unique passwords, enabling SSH key authentication, keeping your software updated, and using a firewall are really important steps. Without these, your Pi could be vulnerable to attacks, so it is something to take

How to Remotely Access a Raspberry Pi From Your PC
How to Directly Connect to a Raspberry Pi Without Internet

how to access Raspberry Pi remotely | MaidaTech
