Simple Ways To Access Your Raspberry Pi From Outside Your Local Network
Having a Raspberry Pi is pretty cool, isn't it? These little computers can do so much, from running a media server to automating parts of your home. But what happens when you are away from your house, and you need to check on your Pi or maybe start a new project on it? That's a common question, and getting to your Raspberry Pi when you are not on your home Wi-Fi can seem a bit tricky at first. It's almost like trying to talk to someone who is behind a closed door, you know?
For many folks, the Raspberry Pi often lives happily on their local network, doing its thing. Yet, the real magic starts when you can reach it from anywhere in the world. Whether you are on vacation, at work, or just across town, having that connection makes your projects so much more flexible and useful. This ability to connect remotely truly opens up a world of possibilities for your small computer, actually.
We're going to explore how you can safely and easily connect to your Raspberry Pi even when you're far from your home network. We'll look at different approaches, some simpler than others, so you can pick the one that feels right for you and your setup. So, let's get into how you can keep tabs on your little device, even when you're out and about, more or less.
Table of Contents
- Understanding the Network Challenge
- Popular Methods for Remote Access
- Keeping Your Pi Safe: Security Tips
- Troubleshooting Common Connection Issues
- Frequently Asked Questions
Understanding the Network Challenge
Before we jump into the "how-to," it's helpful to get a basic idea of why connecting to your Raspberry Pi from outside your local network isn't always straightforward. When your Pi is at home, it has a private IP address, like 192.168.1.100, which is only visible to other devices on your home network. Your router, that box that gives you Wi-Fi, acts like a bouncer, letting traffic in and out but keeping your private network hidden from the wider internet, you know?
The internet sees your router through a single public IP address. This address is how the outside world communicates with your home network. It's a bit like having a single mailbox for a whole apartment building; mail comes to that one box, and then the building manager (your router) sorts it to the right apartment (your Pi). The main issue is that your router usually doesn't know which internal device a specific incoming request is for, particularly if it wasn't something you asked for first, basically.
Sometimes, your public IP address can change. This is called a dynamic IP address, and it's quite common for home internet connections. If your public IP changes, any previous connection settings you made will stop working because the "address" of your home has shifted. This can be a real headache if you're trying to keep a consistent connection to your Pi, so.
- Ifsa Sotwe Turk
- Bomb Threat At Atlanta Airport Today
- Aishah Sofey Leak Free
- As The World Caves In Song Meaning
- Tess Dinerstein White Horse
Popular Methods for Remote Access
There are several good ways to reach your Raspberry Pi from afar, each with its own pros and cons. We'll look at some of the most popular and reliable methods here. You can pick the one that best suits your comfort level and what you want to do with your Pi, actually.
SSH (Secure Shell)
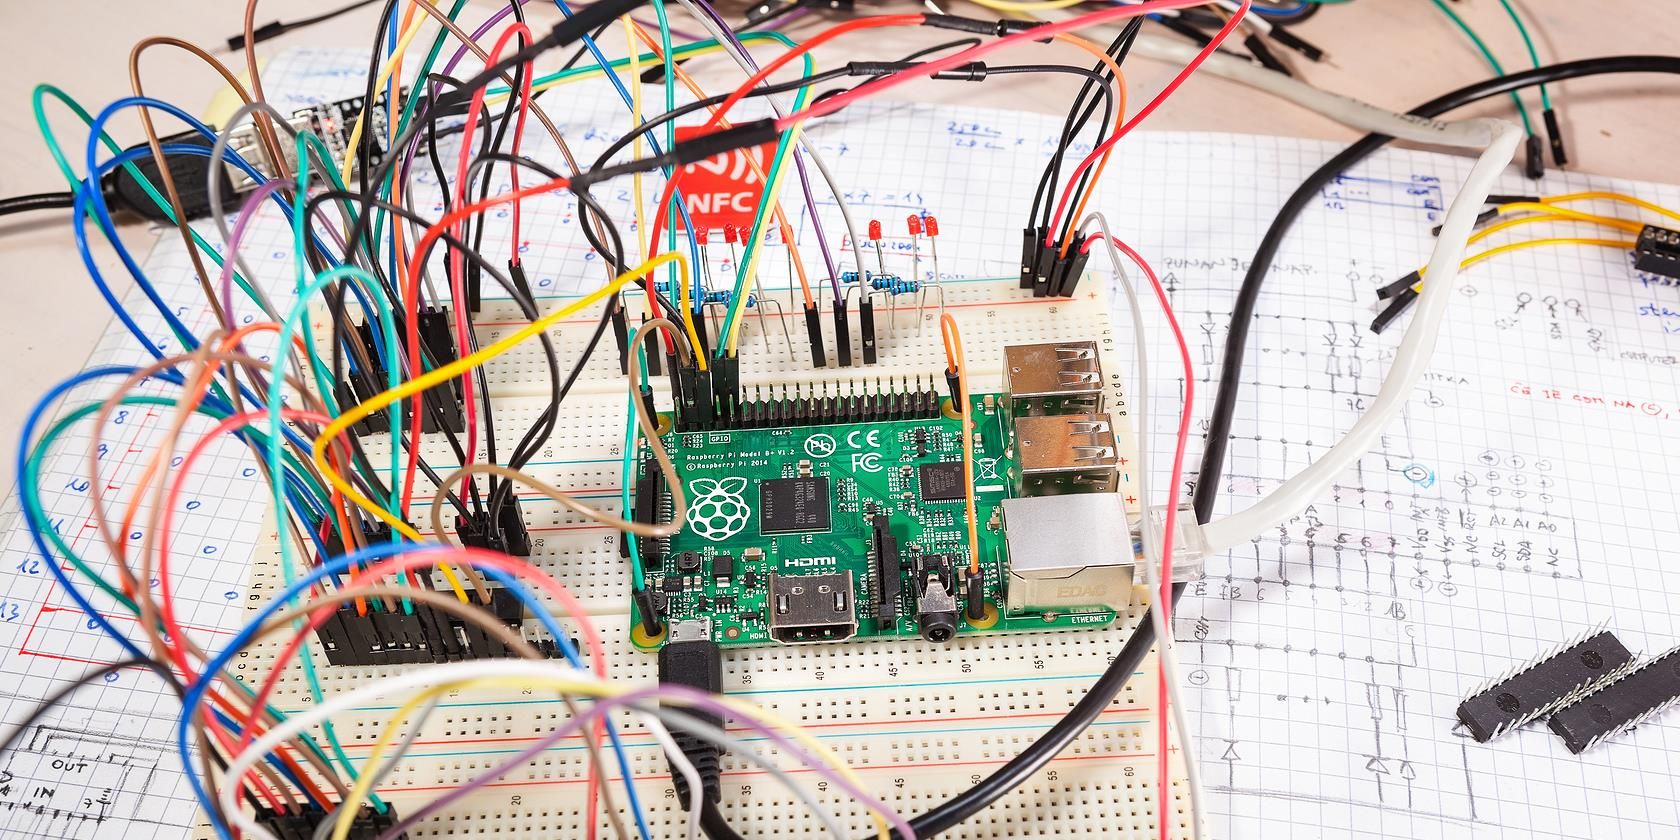
SSH is a very common way to access your Raspberry Pi's command line remotely. It's secure, and it lets you run commands, manage files, and do pretty much anything you could do if you were sitting right in front of your Pi with a keyboard and monitor. This is usually the first step for many remote projects, and it's quite simple to set up, too.
To use SSH, you'll need to enable it on your Raspberry Pi first. You can do this through the Raspberry Pi Configuration tool or by running a simple command in the terminal. Once enabled, you can connect from another computer using an SSH client, giving you a secure text-based connection. It's a very straightforward process, in some respects.
For connecting from outside your local network, SSH typically needs a bit of help from port forwarding on your router, or it can be used over a VPN or tunneling service. We'll talk about those other parts in a moment. But, the core SSH connection itself is a very robust tool for remote control, you know?
VNC (Virtual Network Computing)
If you prefer a graphical desktop experience rather than just the command line, VNC is your friend. VNC lets you see and control your Raspberry Pi's desktop environment as if you were looking at a monitor connected directly to it. This is great for tasks that are easier with a mouse and visual feedback, like browsing the web on your Pi or using graphical applications, you know?
Setting up VNC involves installing a VNC server on your Raspberry Pi and a VNC client on the device you're connecting from. Raspberry Pi OS often comes with RealVNC Connect pre-installed, which makes this setup quite simple. You'll just need to enable the VNC server from the Raspberry Pi Configuration tool, which is a pretty quick thing to do.
Just like SSH, for external access, VNC usually needs port forwarding, a VPN, or a tunneling service to work across the internet. It uses a different port than SSH, so you'll need to make sure that's set up correctly on your router if you go the port forwarding route. This really helps you see what's happening on your Pi visually, you know?
Port Forwarding and Dynamic DNS
Port forwarding is a classic method that tells your router to send specific incoming internet traffic to a particular device on your local network, like your Raspberry Pi. For example, you can tell your router that any traffic coming in on port 22 (the default for SSH) should go straight to your Pi's private IP address. This makes your Pi directly reachable from the internet, which is rather handy.
However, there are a couple of things to keep in mind. First, opening ports on your router can create security risks if not done carefully. You're essentially creating a direct path to your Pi from the internet, so you need to be extra sure your Pi's security is tight. Second, if your public IP address changes (which it often does), your port forwarding setup will break. This is where Dynamic DNS (DDNS) comes in, you see.
DDNS services give you a fixed hostname (like `my-pi.ddns.net`) that automatically updates to point to your current dynamic public IP address. So, instead of remembering a changing IP, you just use that easy-to-remember hostname. Many routers have built-in DDNS clients, or you can run a DDNS client directly on your Raspberry Pi. This makes keeping track of your Pi's address much simpler, naturally.
Setting Up a VPN Server
A Virtual Private Network (VPN) creates a secure, encrypted tunnel between your remote device and your home network. When you connect to your Pi via a VPN, it's as if your remote device is physically connected to your home network, even if you're miles away. This is a very secure and flexible way to get access, as a matter of fact.
You can set up your Raspberry Pi to act as a VPN server using software like OpenVPN or WireGuard. This turns your Pi into the gateway for your remote connections. Once connected to your home VPN, all your remote device's network traffic can go through your home network, letting you access your Pi and any other devices on your home network as if you were there. This is a pretty powerful setup, really.
Setting up a VPN server can be a bit more involved than simple port forwarding, but the security benefits are significant. You only need to open one port on your router for the VPN connection, rather than multiple ports for different services on your Pi. This reduces your exposure to the wider internet, making it a much safer option for remote access, you know?
Cloud-Based Tunneling Services
For those who find port forwarding or VPN setup a bit too much to handle, cloud-based tunneling services offer a simpler path. Services like Ngrok, Tailscale, or Remote.it create secure tunnels from your Raspberry Pi to their cloud servers. Then, you can access your Pi through their service, often without needing to touch your router's settings at all, which is a huge convenience, I mean.
These services are great because they can often bypass tricky network setups, like Carrier-Grade NAT (CGNAT), where your ISP shares a single public IP address among many customers, making traditional port forwarding impossible. You install a small client program on your Raspberry Pi, and it connects to the service's cloud. Then, you use their platform to connect to your Pi, typically.
While many of these services offer free tiers, they might have limitations on speed, bandwidth, or the number of connections. Paid plans usually remove these limits and offer more features. They are a fantastic way to get started with remote access quickly and with less technical hassle, though, you know?
Learn more about Raspberry Pi projects on our site, and link to this page for setting up your Pi.
Keeping Your Pi Safe: Security Tips
When you open your Raspberry Pi to the internet, even through secure methods, security becomes super important. You want to protect your Pi and your home network from unwanted visitors. Here are some simple but vital steps to keep things safe, just a little.
Change Default Passwords: This is probably the most important step. The default username 'pi' and password 'raspberry' are widely known. Change them immediately to something strong and unique. A strong password uses a mix of uppercase and lowercase letters, numbers, and symbols, and is fairly long, you see.
Use SSH Key-Based Authentication: Instead of passwords, use SSH keys for logging in. This is much more secure. You generate a pair of keys: a public key that goes on your Pi and a private key that stays on your computer. Without the private key, no one can log in, even if they guess your password. It's a very good way to lock things down, you know?
Keep Your Software Updated: Regularly update your Raspberry Pi's operating system and software. Developers often release updates that fix security vulnerabilities. Running `sudo apt update && sudo apt upgrade` frequently helps keep your system secure. This is a pretty simple habit to get into, actually.
Enable a Firewall: Use a firewall like UFW (Uncomplicated Firewall) on your Raspberry Pi to control what traffic is allowed in and out. You can configure it to only permit connections on the specific ports you need, like SSH (port 22) or VPN (e.g., port 1194 for OpenVPN), blocking everything else. This adds an extra layer of protection, obviously.
Disable Unused Services: If you're not using certain services on your Pi, disable them. Every running service is a potential entry point for attackers. The less you have running, the smaller your "attack surface" is. This is just good practice for any connected device, basically.
Monitor Logs: Periodically check your Pi's system logs for any unusual activity. This can help you spot potential security issues early. It's like checking the lock on your door, you know?
Troubleshooting Common Connection Issues
Even with the best planning, sometimes things don't quite work as expected. If you're having trouble accessing your Raspberry Pi from outside your local network, here are some common things to check. It's usually something small that needs a little tweak, honestly.
Is Your Pi On and Connected to the Network? This might sound silly, but make sure your Raspberry Pi is powered on and connected to your home Wi-Fi or Ethernet. You can't connect to something that isn't there, after all. A quick check of its status lights can tell you a lot, right?
Double-Check IP Addresses: Make sure you're trying to connect to the correct public IP address of your home network, or the correct DDNS hostname. Also, confirm your Pi's private IP address hasn't changed on your local network. Sometimes routers assign new IPs, which can mess things up, you know?
Router Settings for Port Forwarding: If you're using port forwarding, verify that the rules are set up correctly on your router. Ensure the external port matches the internal port, and that it's pointing to the correct private IP address of your Raspberry Pi. A simple typo can stop everything from working, you know?
Firewall on Your Pi: If you've set up a firewall (like UFW) on your Raspberry Pi, make sure it's allowing connections on the specific port you're trying to use (e.g., 22 for SSH, 5900 for VNC, or your VPN port). Sometimes people forget to open these ports on the Pi itself, you know?
ISP Restrictions: Some internet service providers (ISPs) block certain ports or use Carrier-Grade NAT (CGNAT), which can make port forwarding impossible. If you suspect this is the case, contact your ISP or consider using a cloud-based tunneling service or a VPN that doesn't rely on direct port forwarding. This can be a real roadblock, apparently.
Test Locally First: Before trying to connect from outside, try connecting to your Pi from another computer on your *local* network using the Pi's private IP address. If that doesn't work, the problem is likely with your Pi's setup, not your external network configuration. This helps narrow down where the issue might be, you see.
Frequently Asked Questions
Here are some common questions people ask about getting to their Raspberry Pi from outside their home network.
How can I access my Raspberry Pi from a different network?
You can access your Raspberry Pi from a different network using several methods. The most common ways involve setting up port forwarding on your home router to direct traffic to your Pi, using a VPN server running on your Pi to create a secure tunnel, or employing cloud-based tunneling services like Ngrok or Tailscale. Each method has its own setup process and security considerations, but they all let you connect from afar, usually.
Is it safe to expose my Raspberry Pi to the internet?
Exposing your Raspberry Pi to the internet directly, especially through port forwarding, does carry some risks. It's crucial to take strong security measures. This includes changing default passwords, using SSH key-based authentication, keeping your Pi's software updated, and setting up a firewall. Using a VPN or a secure tunneling service is generally considered a safer approach, as it adds layers of encryption and often avoids direct exposure of your Pi's services to the open internet, you know?
What is the easiest way to remotely access my Raspberry Pi?
For many, the easiest way to remotely access a Raspberry Pi is by using a cloud-based tunneling service. These services typically require minimal configuration on your router and can bypass common network hurdles like dynamic IP addresses or ISP restrictions. You install a small program on your Pi, and then you can connect through the service's website or app, which is very convenient. While some setup is still needed, it's often simpler than manually configuring port forwarding or a VPN server, pretty much.
Getting your Raspberry Pi accessible from anywhere is a fantastic step for any project. It gives you so much more freedom and control over your small computer, letting you work on things or check on them no matter where you are. So, try out one of these methods, and see how much more you can do with your Pi!
- Denzel Washington Training Day
- Bonnie Blue 1000 People Video
- Sowte Ifsa
- Thanos Actor Age Squid Game
- Emily Compagno Children
How to Directly Connect to a Raspberry Pi Without Internet

Access Your Raspberry Pi From Outside Your Home or Local Network

SSH Raspberry Pi Outside Network: Enabling Remote Access 2023
