Remotely Access Raspberry Pi Remoteiot Tutorial
Ever wondered how you could manage your little Raspberry Pi computer, even when you're miles away? It's a pretty cool thought, isn't it? Like having a tiny assistant you can talk to from anywhere. For folks who enjoy building things with technology, or maybe just want to keep an eye on a home project, learning to remotely access your Raspberry Pi is a truly helpful skill. It opens up a whole lot of possibilities for automation and control, allowing your projects to work for you, no matter where you happen to be.
The Raspberry Pi, a small but mighty computer, has become a favorite for many, very often for its role in the world of IoT, or the "Internet of Things." This means connecting everyday objects to the internet, letting them send and receive information. Imagine your Pi collecting data from sensors in your garden, or maybe controlling lights in your home. That's all great, but what if you're not actually at home? What if you're out and about, or even working remotely, perhaps from a different state, like those who `work from home over the usa`?
This guide is here to show you how to set up your Raspberry Pi so you can reach it from almost anywhere. We'll go over the steps needed to get things ready, making sure you can connect and control your Pi with ease. It's about giving you the freedom to manage your projects without being physically present. So, you know, let's get into how you can make your Raspberry Pi truly remote-friendly.
Table of Contents
- Why Remote Access for Your Raspberry Pi is a Big Deal
- Getting Your Raspberry Pi Ready
- Connecting Remotely: SSH, the Command-Line Friend
- Seeing Your Pi: VNC for a Visual Experience
- Making It More Secure and Stable
- Common Questions About Remote Access
- Wrapping Things Up: Your Remote Pi Adventure
Why Remote Access for Your Raspberry Pi is a Big Deal
The Joy of Managing from Afar
Think about it: you've got a Raspberry Pi running a weather station in your garden, or maybe it's serving up media to your TV. What if you're away from home for a bit, and you want to check on things, or perhaps make a quick change? That's where remote access comes in, and it's a very big deal. It means you don't have to be physically next to your Pi to interact with it, which is pretty handy. This freedom is a lot like the flexibility offered by `remote jobs from hundred companies`, where you can work from different places without being tied to an office.
- Bonnie Blue 1000 People Video
- Squirrel Girl Punk Skin
- Is Cal Raleigh Married
- Iran Live Cameras
- Is Emily Compagno Married
For those interested in IoT projects, this ability to `remotely access raspberry pi remoteiot tutorial` is almost a must-have. It lets you monitor sensors, control devices, or even update software on your Pi without needing to plug in a keyboard and monitor every single time. It saves you time and makes your projects much more practical for real-world use. This kind of flexibility, you know, is something many people look for in their work life too, like when they `find the remote job that best fits your schedule and career goals`.
What You'll Need to Get Started
Before we jump into the steps, let's just quickly go over what you'll want to have on hand. You'll need your Raspberry Pi, of course, with its operating system (usually Raspberry Pi OS) already set up on an SD card. A reliable internet connection for both your Pi and the device you'll use to connect from afar is also quite important. A power supply for your Pi is, naturally, a given. You'll also want a computer or another device, like a laptop or a phone, to connect from. This is pretty much all you need to begin your remote access journey.
Getting Your Raspberry Pi Ready
Initial Setup and Network Connection
First things first, your Raspberry Pi needs to be up and running and connected to your home network. If you've just unboxed your Pi, you'll want to install Raspberry Pi OS onto an SD card. There are plenty of guides out there for this, so we won't go into every little detail here. Once the OS is on, boot up your Pi and make sure it's connected to your Wi-Fi or via an Ethernet cable. You can check this by opening a web browser on the Pi and seeing if you can visit a website. This is, in a way, the foundation for everything else we'll do.
It's also a good idea to update your Pi's software. Open a terminal window on your Pi and type these commands, one after the other: `sudo apt update` and then `sudo apt full-upgrade`. This process can take a little while, depending on how many updates there are, but it's really worth doing to keep everything current and running smoothly. This ensures your system is prepared for new connections and, you know, stays secure.
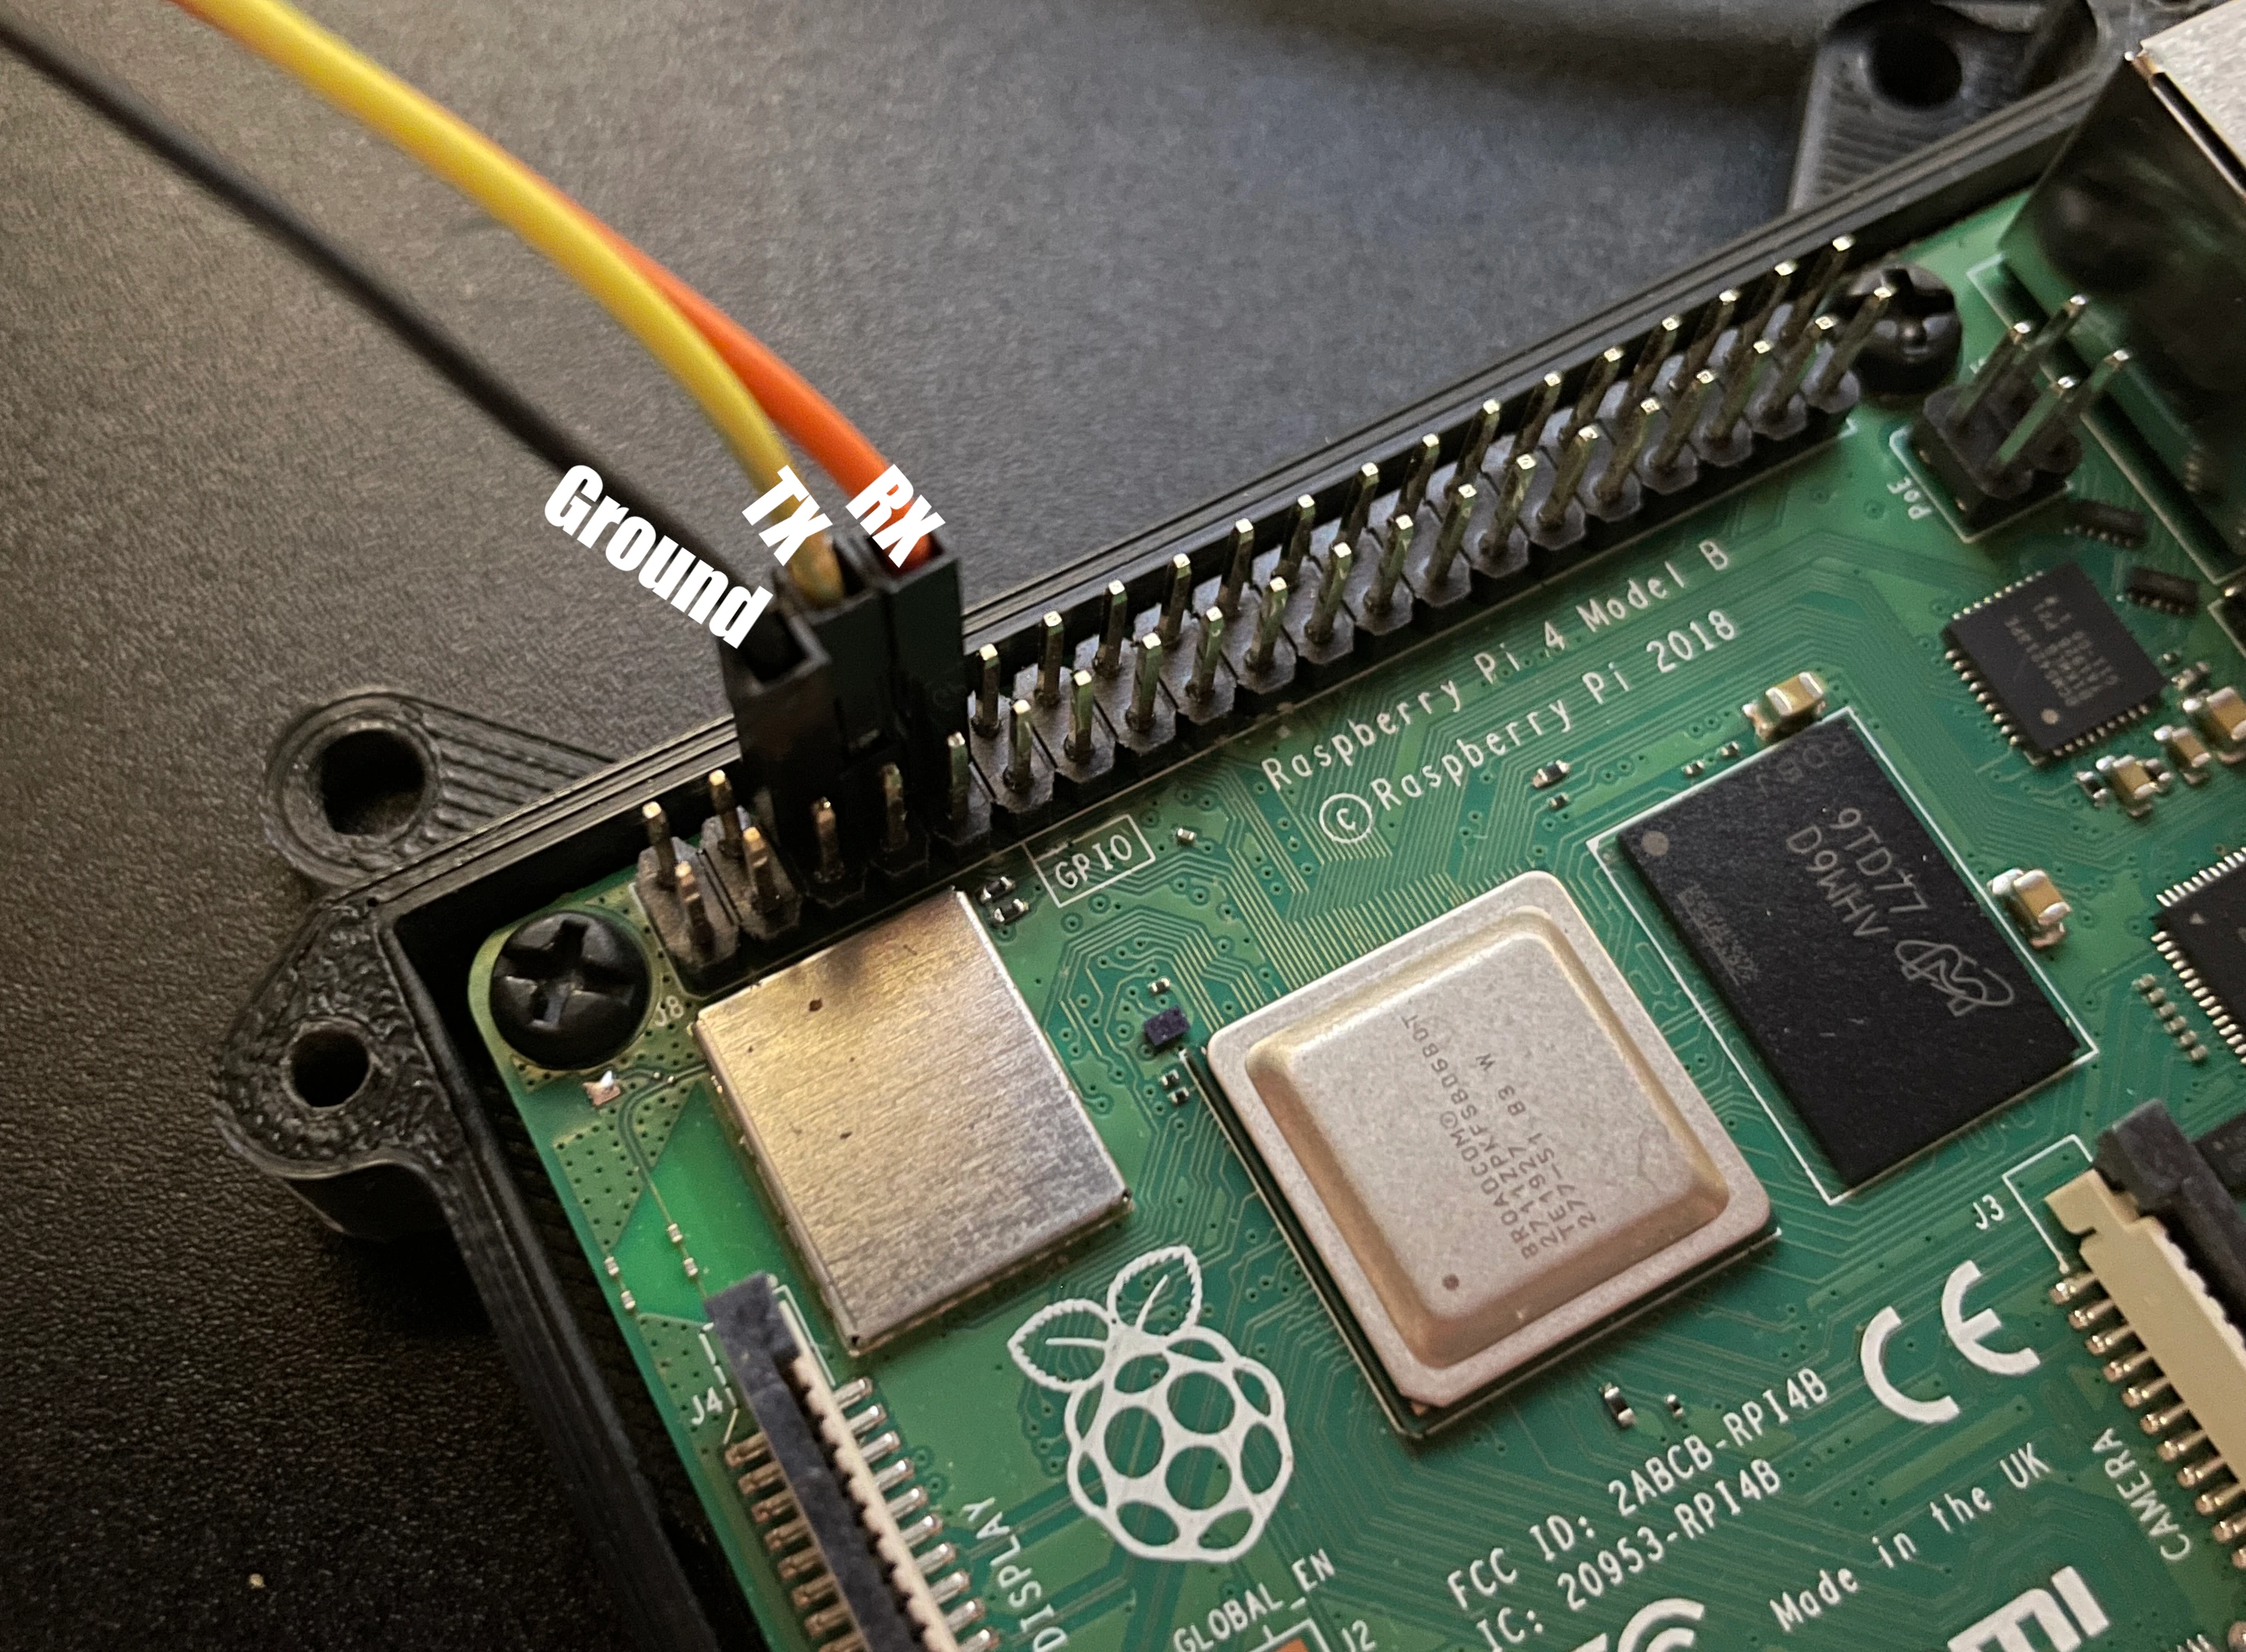
Enabling SSH and VNC
For remote access, we'll mostly use two main tools: SSH (Secure Shell) and VNC (Virtual Network Computing). SSH lets you control your Pi using text commands, which is very efficient. VNC gives you a full graphical desktop experience, just like you're sitting in front of your Pi with a monitor. Both are pretty simple to enable. You can do this through the Raspberry Pi Configuration tool, which you'll find under the Preferences menu.
Open the Raspberry Pi Configuration tool. Go to the "Interfaces" tab. You'll see options for SSH and VNC. Just click the radio buttons next to them to "Enable" them. After you've done that, you might need to restart your Pi for the changes to take effect. It's a quick step, but, you know, a very important one for what we're trying to do.
Connecting Remotely: SSH, the Command-Line Friend
SSH from Your Local Network
Let's start with connecting to your Pi when you're on the same home network. This is the easiest way to begin. First, you need to find your Raspberry Pi's IP address. On your Pi, open a terminal and type `hostname -I`. This will show you the IP address. Write it down, because you'll need it. It will look something like `192.168.1.100`. Now, from your computer, open a terminal (on Linux/macOS) or PowerShell/Command Prompt (on Windows). You'll type `ssh pi@YOUR_PI_IP_ADDRESS`, replacing `YOUR_PI_IP_ADDRESS` with the address you just found. For example, `ssh pi@192.168.1.100`. You'll be asked for your Pi's password, which is `raspberry` by default. After that, you're in! You can now type commands to your Pi as if you were right there. It's, you know, pretty neat.
SSH from Outside Your Network: Port Forwarding
Connecting from outside your home network is a bit more involved, but it's how you truly `remotely access raspberry pi remoteiot tutorial`. This usually means setting up "port forwarding" on your home router. Port forwarding tells your router to send incoming requests on a specific "port" (like a digital doorway) to your Raspberry Pi. For SSH, the standard port is 22. You'll need to log into your router's settings, usually by typing its IP address into a web browser (often `192.168.1.1` or `192.168.0.1`). Look for a section called "Port Forwarding," "NAT," or "Virtual Servers."
You'll create a new rule:
- **Service Port/External Port:** 22 (or a different, less common port for better security, say 2222)
- **Internal Port:** 22
- **IP Address:** Your Raspberry Pi's internal IP address (e.g., `192.168.1.100`)
- **Protocol:** TCP
Seeing Your Pi: VNC for a Visual Experience
Setting Up VNC Server on Your Pi
While SSH is great for commands, sometimes you just want to see your Pi's desktop, you know, with all its icons and windows. That's where VNC comes in. You already enabled VNC in the Raspberry Pi Configuration tool. Now, you might want to set up a specific password for VNC connections. When you first enable VNC, it often prompts you to set this up. If not, you can run `vncserver` in the Pi's terminal, and it will guide you through creating a password. Make sure it's a strong one. This password is separate from your Pi's login password. It's, you know, a very important security measure.
Connecting with VNC Viewer
To connect to your Pi using VNC, you'll need a VNC Viewer application on your computer or phone. RealVNC Connect is a popular choice, and they offer a free VNC Viewer that works very well. Download and install it on your device. Once installed, open the VNC Viewer. You'll need to enter your Pi's IP address. If you're on the same network, use its internal IP (e.g., `192.168.1.100`). If you're connecting from outside your network, you'll use your home's public IP address, similar to how you did with SSH. You might also need to set up port forwarding for VNC (standard port 5900) on your router, just like we did for SSH. When prompted, enter the VNC password you set earlier. Then, just like that, you'll see your Pi's desktop right on your screen. It's, you know, pretty cool to see it all come to life.
Making It More Secure and Stable
Using a VPN for Better Security
While port forwarding works, it does open up your home network a little bit. For better security, especially if you're dealing with sensitive projects or just want peace of mind, considering a VPN (Virtual Private Network) is a good idea. A VPN creates a secure, encrypted "tunnel" between your remote device and your home network. This means your Pi doesn't need to be directly exposed to the internet. Setting up a VPN server on your Pi or router is a more advanced step, but it offers a much safer way to `secure remote Pi connection`. There are many tutorials online for setting up VPNs like OpenVPN or WireGuard on a Raspberry Pi. It's a bit more work, but, you know, it's worth it for the extra safety.
Dynamic DNS for Changing IP Addresses
One challenge with connecting from outside your network is that your home's public IP address might change. Most internet service providers give you a "dynamic" IP, which means it can change from time to time. This can be annoying when you're trying to connect to your Pi. A solution for this is Dynamic DNS (DDNS). A DDNS service gives you a consistent web address (like `myhomepi.ddns.net`) that always points to your home's current public IP address, even if it changes. Many routers have built-in DDNS clients, or you can run a client on your Raspberry Pi. Services like No-IP or DuckDNS offer free DDNS options. This makes it, you know, much easier to always find your Pi.
Common Questions About Remote Access
Here are some common questions people ask when they're looking to `remotely access raspberry pi remoteiot tutorial`:
How do I access my Raspberry Pi from outside my network?
To access your Raspberry Pi from outside your home network, you typically use port forwarding on your router. This directs incoming connections on specific ports (like 22 for SSH or 5900 for VNC) to your Pi's internal IP address. You'll then use your home's public IP address to connect. Alternatively, for more security, you can set up a VPN server on your Pi or router, which creates a secure tunnel to your home network, allowing you to access your Pi as if you were on the local network.
Is it safe to port forward for Raspberry Pi remote access?
Port forwarding does open a "doorway" into your home network, which carries some risks. It's generally recommended to use strong, unique passwords for your Pi, keep its software updated, and consider using a non-standard port for SSH (e.g., 2222 instead of 22). For the highest level of security, a VPN is preferred over direct port forwarding, as it encrypts all traffic and avoids directly exposing your Pi to the internet. So, you know, be careful with it.
What's the easiest way to control a Raspberry Pi remotely?
For a command-line interface, SSH is arguably the easiest and most efficient way to control your Raspberry Pi remotely. Once enabled, you just need an SSH client on your computer and your Pi's IP address. For a visual desktop experience, VNC is the easiest option. After enabling VNC on your Pi and installing a VNC Viewer on your connecting device, you can see and interact with your Pi's graphical desktop as if you were sitting right in front of it. Both are, you know, pretty straightforward to set up.
Wrapping Things Up: Your Remote Pi Adventure
Getting your Raspberry Pi set up for remote access is a truly rewarding step for anyone keen on IoT or just wanting more control over their tech. It means your projects are no longer tied to your physical location, giving you the freedom to monitor and manage them from almost anywhere. Whether you're just checking in on a sensor or deploying a new piece of code, the ability to `remotely access raspberry pi remoteiot tutorial` makes your Pi a much more powerful tool in your hands. This kind of flexibility, you know, is something many people value, especially those who `find the best remote jobs, online jobs and work from home jobs`.
The skills you pick up here, like understanding network connections and basic security, are useful beyond just your Raspberry Pi. They're part of a bigger picture of how technology connects us, especially in a world where `the meaning of remotely is to a remote extent`. If you're looking for opportunities where you can apply these kinds of skills, or perhaps find work that lets you `work on your own schedule`, you might want to check out job boards that focus on remote work. One such place is Remote.io, which is `a job board for remote workers and people who wish to work from home`. They list `more than 50 000 remote jobs from hundred companies`, offering `advanced job search for we work remotely` in various fields like `programming, marketing, customer service, etc`. It's a great spot to `find your next remote career`.
So, go ahead and try these steps. See how empowering it feels to have your little computer listening to your commands from afar. It's a great step in your tech journey. You can learn more about remote work opportunities on our site, and also find out more about how technology enables flexible careers.
- Aishah Sofey Content
- Imskirby The Dog Incident
- Emily Campagno
- Mysterious Skin Bathroom
- Iran Live Cameras

how to access Raspberry Pi remotely | MaidaTech

How To Remotely Access Raspberry Pi Using RemoteIoT Tutorial
9 Ways to Access Your Raspberry Pi Remotely :: The Quantizer
